
Confirmation when locking/unlocking the vehicle
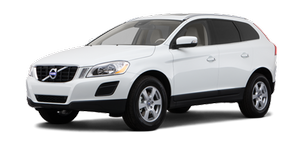
Settings can be made in the menu system for audible and visual confirmation when the vehicle has been locked or unlocked. With these functions activated, the following will occur when the vehicle is locked/unlocked:
Locking confirmation
• The turn signals flash once, an audible signal sounds and the door mirrors will fold* in.
Confirmation will only be given when all doors and the tailgate are properly closed and locked.
NOTE
If you do not receive confirmation when
locking the vehicle, check whether a door or
the tailgate is ajar, or if this feature has been
turned off in the menu.
Unlocking confirmation
• The turn signals will flash twice and the door mirrors will fold* out.
Making a setting
Different alternatives for locking/unlocking confirmation can be selected in the menus by pressing MY CAR on the center console control panel.
• To activate visual confirmation: go to
Settings
 Car settings
Light
settings and select Door lock
confirmation light and/or Unlock
confirmation light by pressing OK/
MENU.
Car settings
Light
settings and select Door lock
confirmation light and/or Unlock
confirmation light by pressing OK/
MENU.
• To activate audible confirmation: go to
Settings
Car settings
Lock
settings and select Audible
confirmation by pressing OK/MENU.
See page 133 for a description of the menu system.
See also:
Windshield wipers/washers
Windshield wipers and washers
1 - Rain sensor* on/off
2 - Thumb wheel sensitivity/frequency
CAUTION
Use ample washer fluid when washing the windshield. The windshield should
be thoroughly ...
Removing and storing the cargo net
Press the release buttons on the locks on
the straps and pull out a small section of
the strap.
Press in the catches on the straps' hooks
and remove the hooks from the eyelet.
Fold u ...
Wind blocker
The moonroof is equipped with a wind blocker that folds up when the moonroof
is open. ...