Introduction

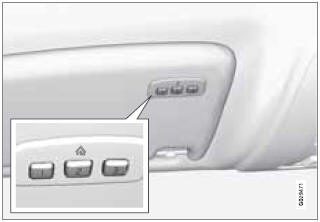
The HomeLink1 Wireless Control System provides a convenient way to replace up to three hand-held radio-frequency (RF) transmitters used to activate devices such as gate operators, garage door openers, entry door locks, security systems, even home lighting. Additional HomeLink information can be found on the Internet at www.homelink.com.
![]() WARNING
WARNING
- If you use HomeLink to open a garage door or gate, be sure no one is near the gate or door while it is in motion.
- When programming a garage door opener, it is advised to park outside of the garage.
- Do not use HomeLink with any garage door opener that lacks safety stop and reverse features as required by U.S. federal safety standards (this includes any garage door opener model manufactured before April 1, 1982). A garage door that cannot detect an object - signaling the door to stop and reverse - does not meet current U.S. federal safety standards. For more information, contact HomeLink at: www.homelink.com.
Retain the original transmitter of the RF device you are programming for use in other vehicles as well as for future HomeLink programming. It is also suggested that upon the sale of the vehicle, the programmed HomeLink buttons be erased for security purposes. Refer to “Erasing HomeLink Buttons”.
See also:
Performance
The C70 doesn't compete with the BMW M3s and Chevrolet Corvettes of the
convertible world. It's more subdued than that, even when you get the
top-of-the-line engine and option package like we test ...
Storing the position
The mirror positions are stored in the key memory when the vehicle has been locked
with the remote key. When the vehicle is unlocked with the same remote control the
mirrors and the driver's s ...
Making a call
1. Ensure that is shown at the
top of the
center console display and that the handsfree
function is in telephone mode.
2. Dial the desired phone number using the
center console keypad or use ...