Design concept
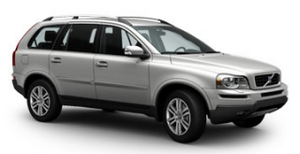
At the front, the traditional Volvo V-shaped bonnet incorporates a grille with a wide chrome surround and three-dimensional mesh inserts, plus a large Volvo 'iron mark' badge. The front bumper has a degree of colour-coding and an extended skidplate built into it. The Volvo XC90 is also distinguished by 18in alloy wheels (standard on SE and SE Lux) and colour-coded side mouldings, door handles and wheelarch mouldings with black stone protectors. In line with the rest of the Volvo range, the Volvo XC90 also features large, body-coloured door mirrors, which incorporate the side indicator lights.
The muscularity of the Volvo XC90 is matched by rounded corners front and rear, a gently sloping (split) tailgate and shorter roof section to promote a smoother, non-aggressive impression and help the vehicle to look more compact and desirable.
The Volvo XC90's 'cockpit forward design' enables the passenger compartment to be as far forward as possible with a more steeply raked windscreen than in most other SUVs. This has allowed Volvo to make a seven-seat SUV within modest overall body dimensions.
The Volvo XC90's tailgate is gently sloping rather than vertical to clearly state that this is not a regular Volvo estate car. The resulting shorter roofline also helps the vehicle appear smaller and gives it a sporty stance.
For added convenience, the tailgate is split so the lower section can be used as a seat or table; it is strong enough to be stood upon when loading items onto the roof, and the upper section is not too large, heavy or high when opened.
See also:
Advanced Sirius settings
This menu function enables you to make settings
on certain Sirius satellite radio functions.
To access this menu:
1. Press OK/MENU.
2. Scroll to the Advanced settings menu
and press OK/MENU.
W ...
Quality and Equipment
A passion for high quality lies at the heart of the Volvo brand. This is
inherent not only in the build quality that reflects the ruggedness, durability
and reliability for which Volvo is renowned ...
Storing a channel
A total of 20 satellite channels can be stored;
10 channels each for Sirius 1 and 2.
• A long press on one of the number keys
stores the currently tuned channel on that
key.
• A short press on a ...